Secure File Exchange Download
Secure File Exchange is a cross-platform SFTP and web-based file transfer solution that helps you access both local and cloud-based storage.
Self Installation
Secure File Exchange builds are available for self-install on your hardware or virtual machine.
Select your platform in the dropdown in the right-hand sidebar and click in the checkbox to enable your download. Click download to start.
For complete installation documentation, please visit our Documentation page.
Graphical Installation
Start the installer by double-clicking on the downloaded file.
Run through the installation steps. You will be asked to decide which components to install during the installation. You can install the base open-source server and, optionally, our Enterprise plugins that require a license. If you don’t license the Enterprise plugins, they will be disabled, and you still have full access to the open-source features.
The key installation prompts are:
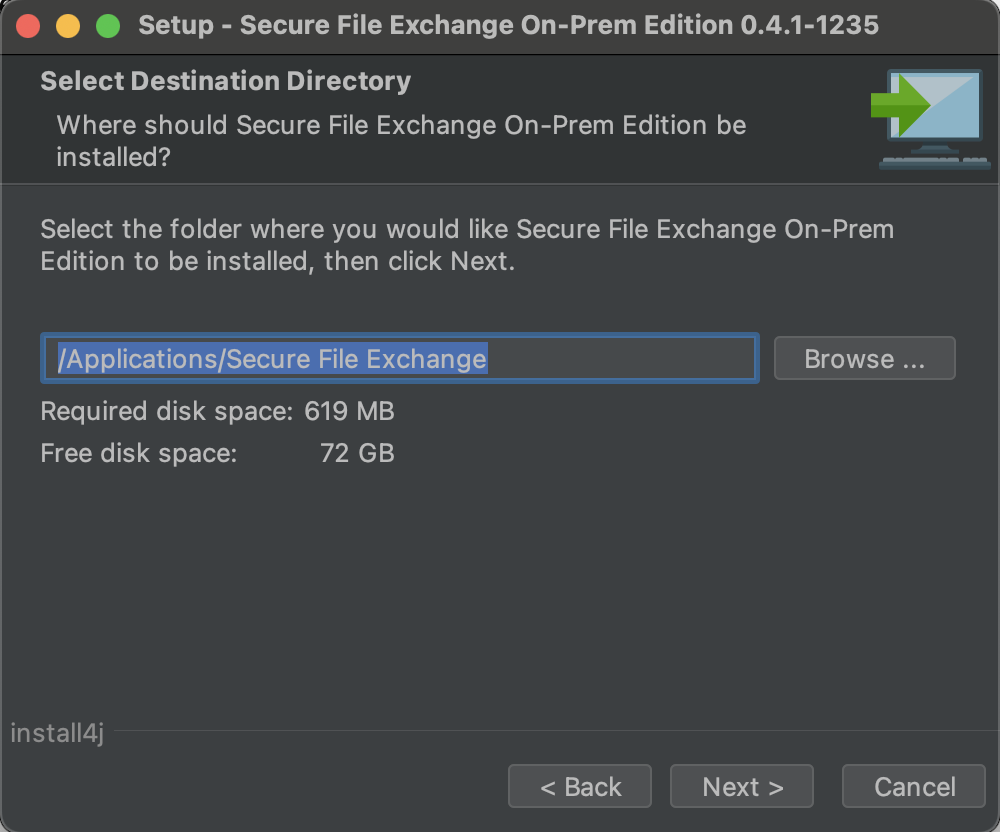
- Select the installation directory
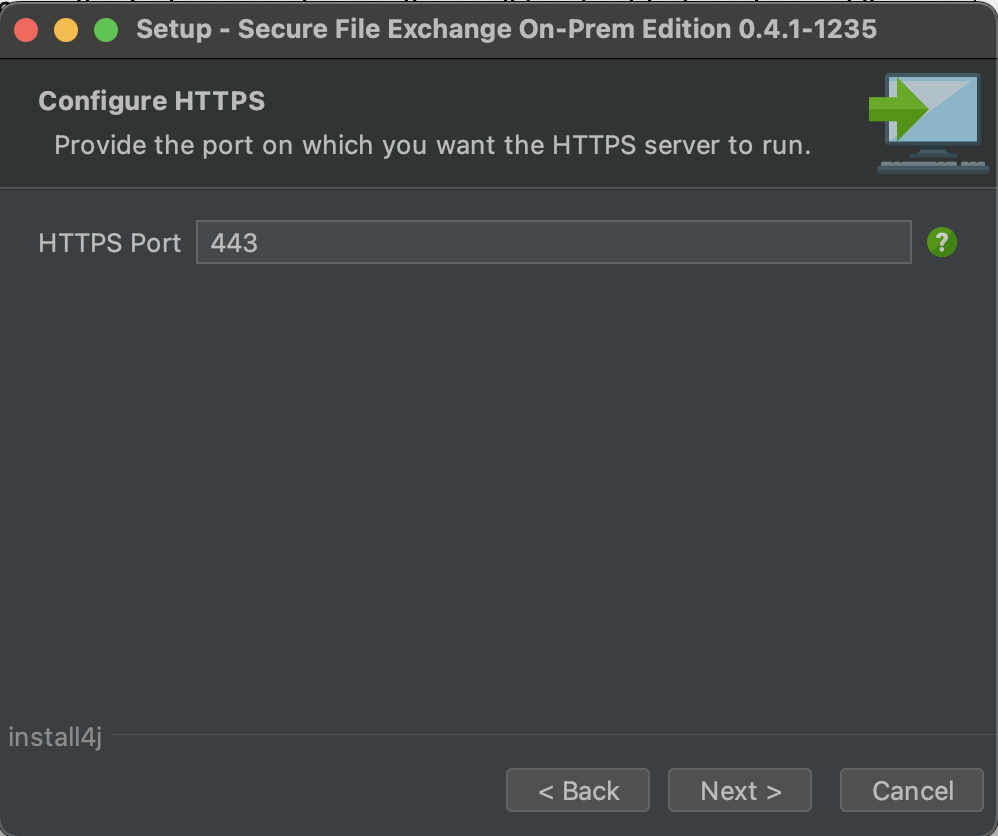
2. Define the HTTPS port that you will use to access the Administrative interface.
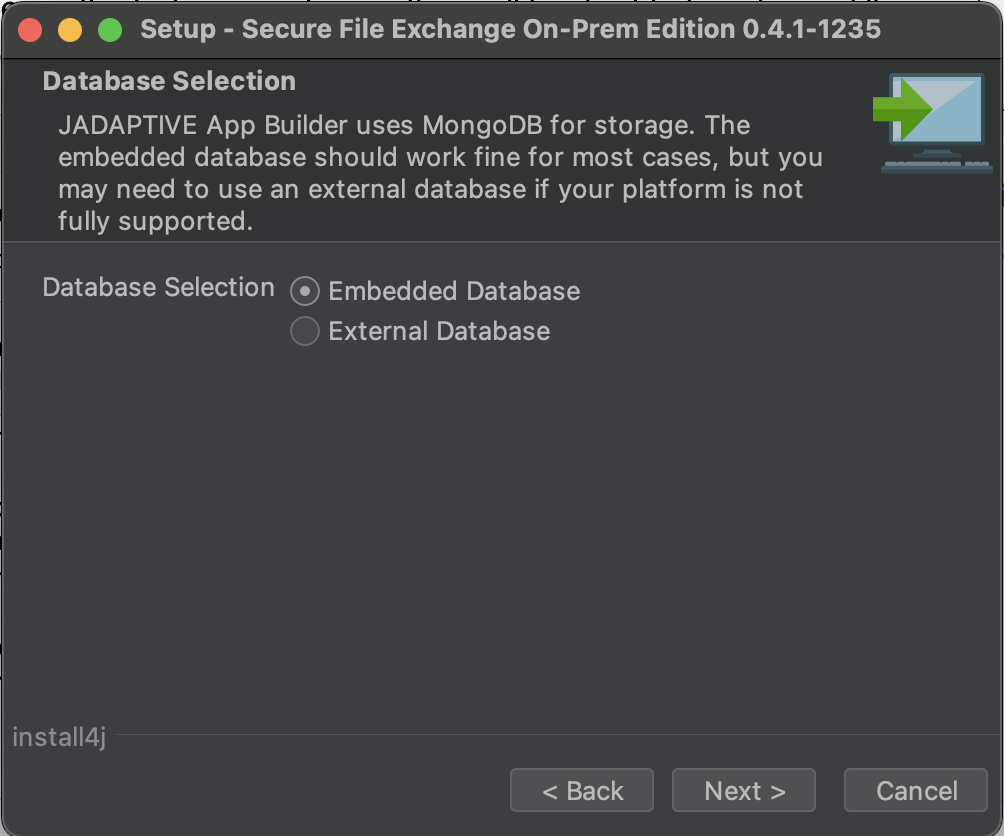
3. Select the type of database you want to use. For new users we recommend you select the Embedded Database option.
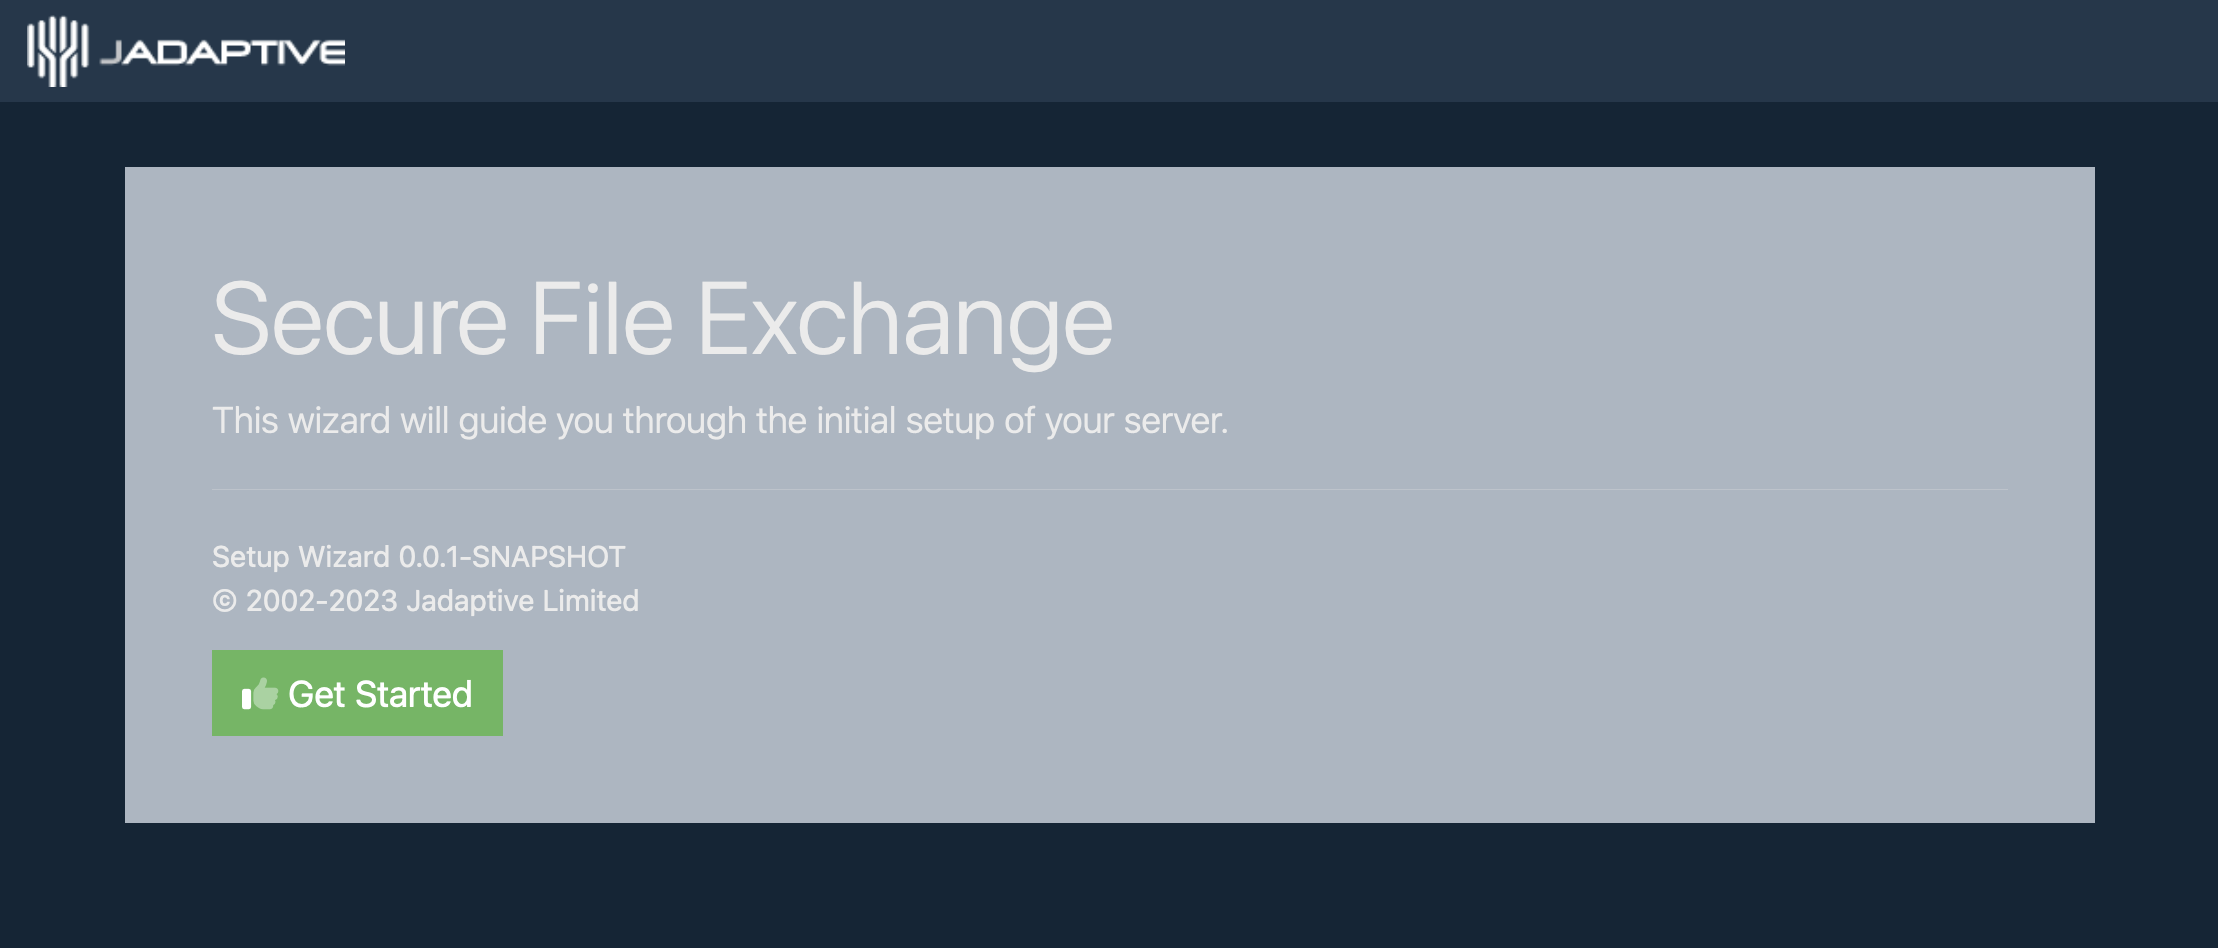
After installation, the service will have been automatically started. Navigate to the web service using the IP address of the machine you installed it on https://<ip_address>/ and you should see the Setup Wizard start page.
Setup Wizard
You can see how to set up using the Wizard in our video below.
Download
Secure File Exchange is a cross-platform solution that can be installed on most operating systems.