Documentation
Nodal VPN
Getting Started with Nodal VPNSigning up for Nodal VPN
Deploying Nodal Agent on Proxmox
Deploying Nodal Agent on VMware ESXi
Deploying Nodal Agent on Hyper-V
Creating a VPN Network
Nodal VPN Client Configuration
Installing the Windows VPN client
Connecting the Nodal VPN Client
Setting a static IP on the Nodal Agent
Password Express
Getting Started with Password ExpressSigning up for Password Express
Installing Windows Connect
Performing a Password Reset
Configuring Authentication Policies for Password Reset
Enrolling a User
Secure File Exchange
Installing on WindowsInstalling on Linux
Installing an SSL Certificate
Uninstalling (All Platforms)
Virtual File System
Browsing Files
Sharing Files
Upload Forms
Incoming Files
Sharing Shortcodes
File Systems
Mounting External FilesLocal Files
Plan Storage
SFTP Folders
Windows Shares
S3 Buckets
Goggle Cloud Storage
Azure Containers
Server Management
Installing the Windows Credentials ProviderUser Accounts
Roles
Authorized Keys
Event Logs
Email Messages
HTML templates
Session Management
Authentication Modules
Authentication Policies
SMTP Configuration
User Interface
BrandingUser Interface Themes
Deploying Nodal Agent on VMware ESXi
The Jadaptive Nodal VPN service requires an agent to be installed in your network. Your end-user’s VPN clients will connect through this endpoint for their VPN sessions.
This article covers deploying the OVA VM image in a VMware ESXi environment.
1. Downloading the Agent VM
Whilst logged into your cloud tenant, click the Download button at top right then select Download under Nodal Agent.
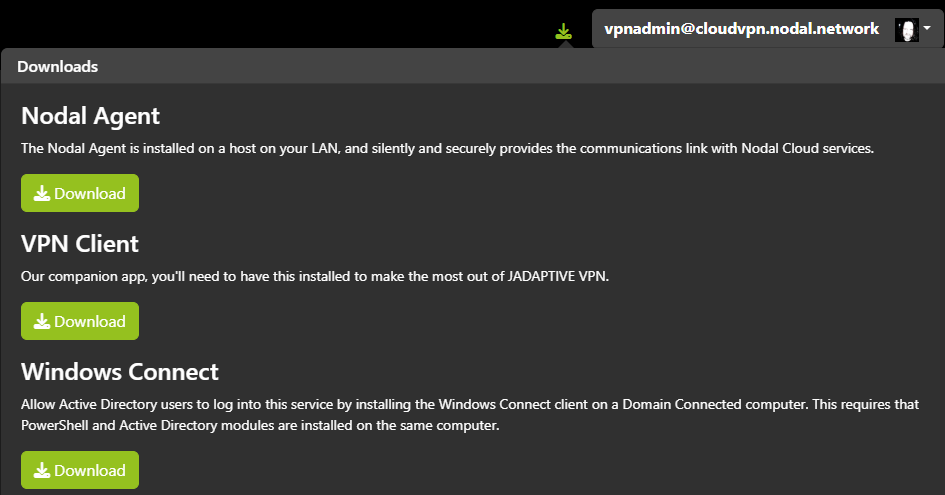
On the next screen, choose to download the OVF file.
The downloaded file will be named something like: nodal-agent-ovf-<version>.ovf.zip. Unzip this file after download.
2. Deploying the VM
In ESXi, right click Virtual Machines, then Create/Register VM
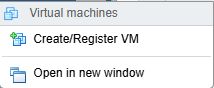
Select Deploy a virtual machine from an OVF or OVA file and click Next.
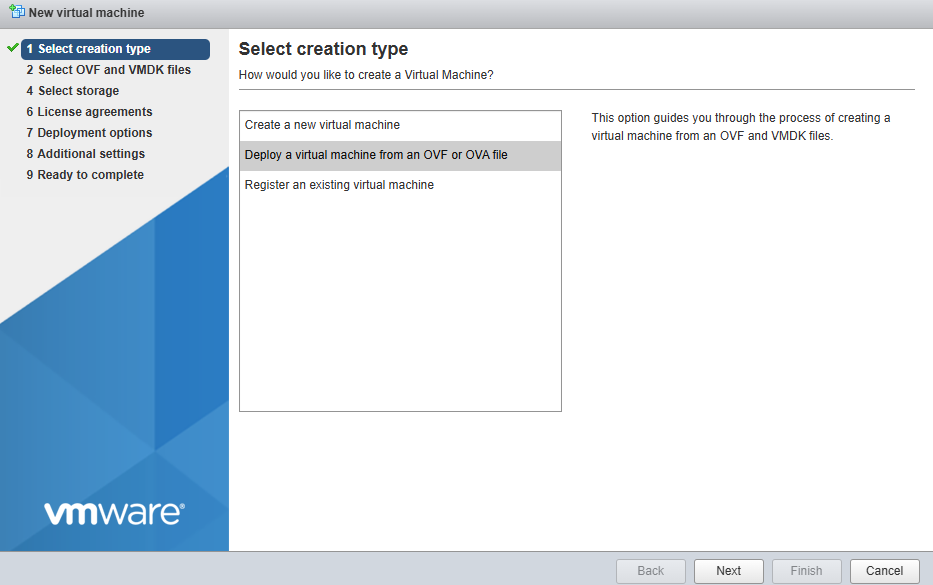
Give the new VM a name and click to select the OVF and VMDK files. Click Next.
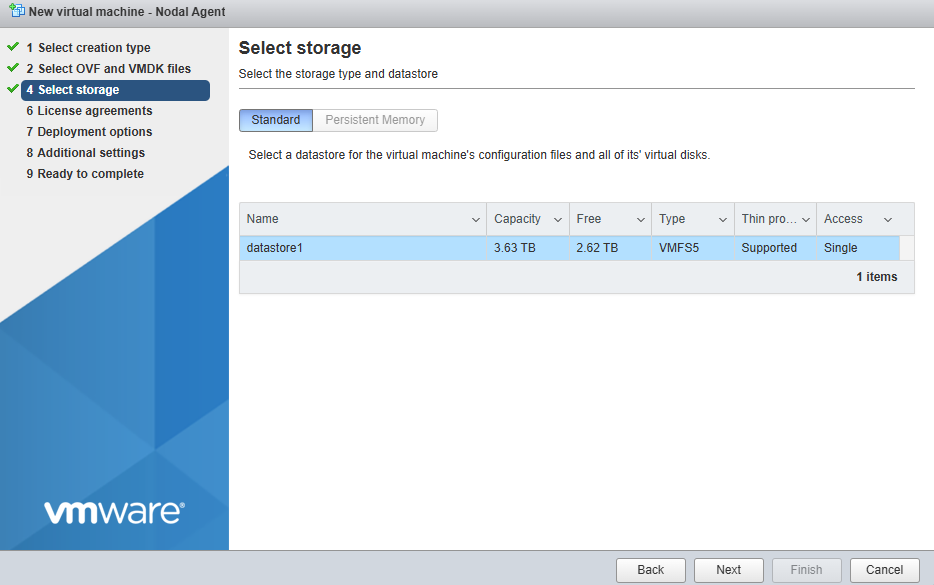
Select the datastore for the VM and click Next.
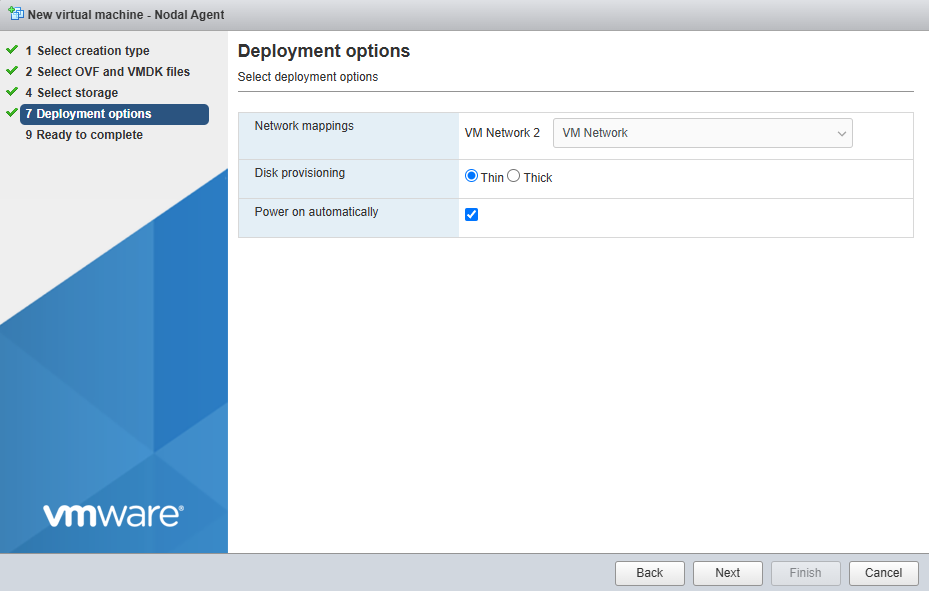
Select your networking interface and disk provisioning type (thin should be a good default) and click Next.
Click Finish.
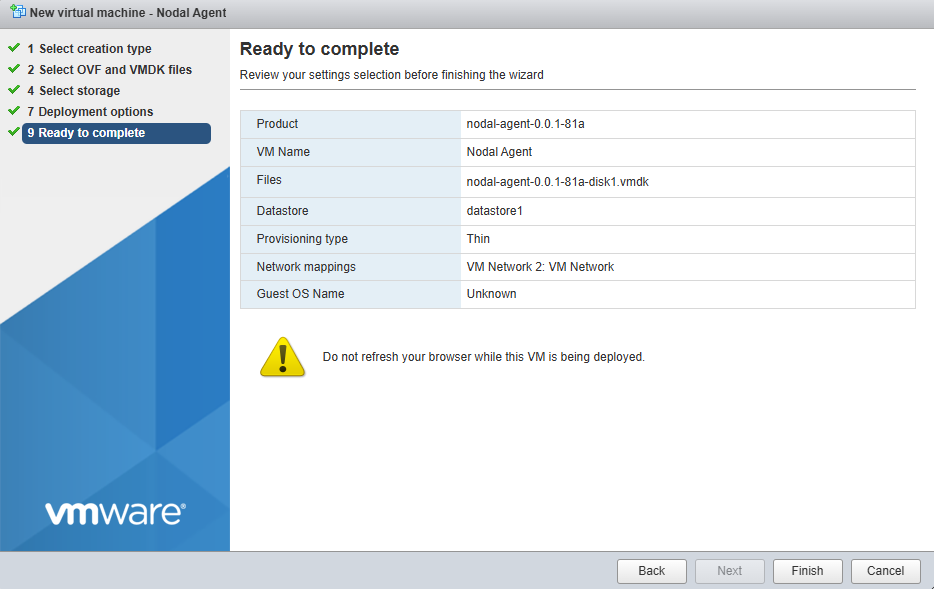
Your files are now uploaded and the VM is provisioned. Start the VM after deployment if it did not automatically start up.
3. Authorizing the Nodal Agent
On first boot, you are prompted to log in with the username: nodal-agent.
Log in as this user now and change the password when prompted.

You are now logged in and are presented with the Nodal Agent summary.
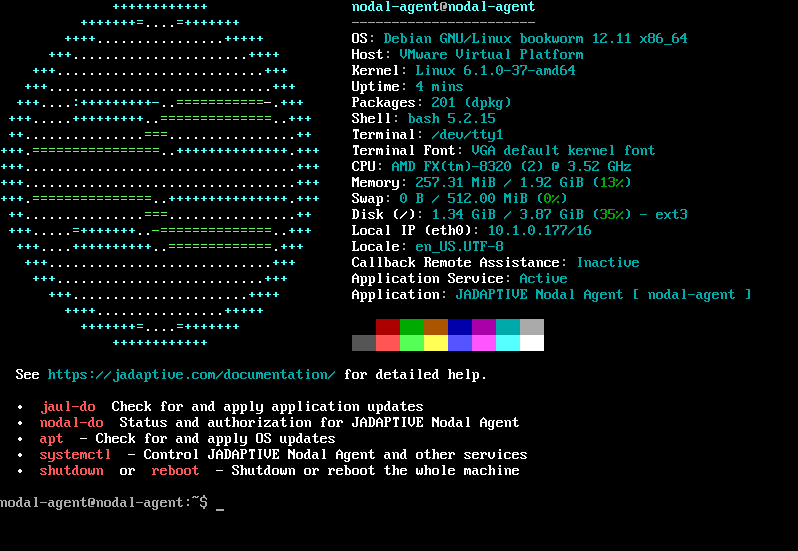
If you want to change the IP Address, please refer to this article:
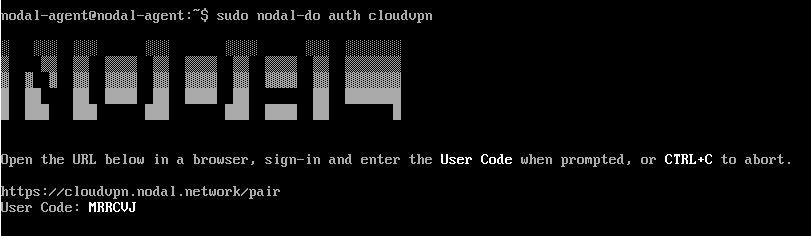
As this is the first time you are logging into your Nodal Agent, the tenant registration process should start automatically. If for any reason this does not start, you can manually start the process with the command:
nodal-do auth <tenanthostname> <agentname>The <tenanthostname> can be just the subdomain that you chose when creating your tenant if you opted for the default top level nodal.network domain. If you chose to use another domain, this needs to be the fully qualified hostname
<agentname> is optional, if you leave this blank a random name will be chosen.
Enter your <tenanthostname> when prompted and press enter.

Either type in your <agentname> and press enter or press enter to accept a random name.

You will now be prompted to visit your tenant on a URL to pair your agent.
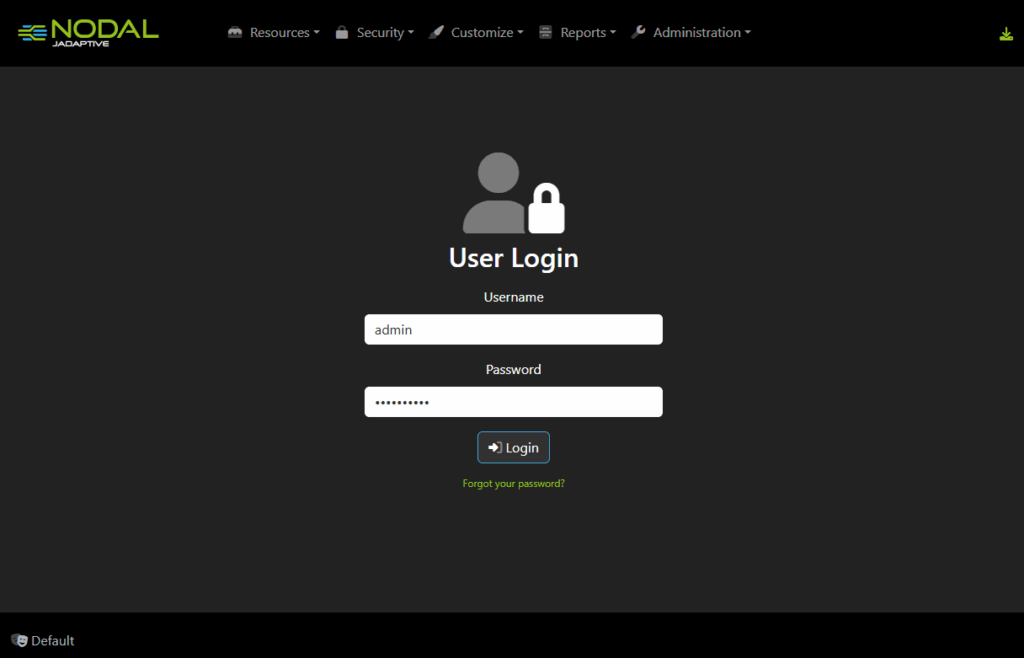
In a browser, visit the pair URL and log in with your admin credentials.
Now enter the User Code as displayed on your Agent.
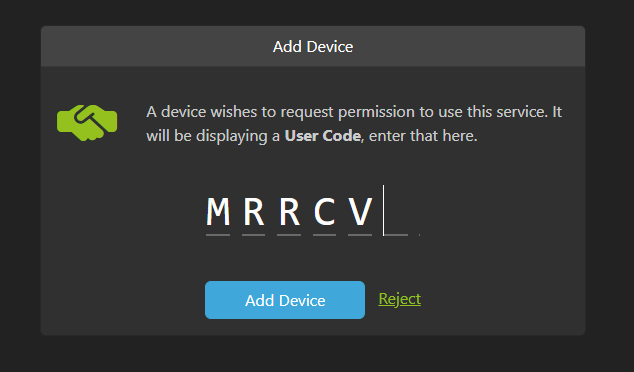
Finally, click Approve.

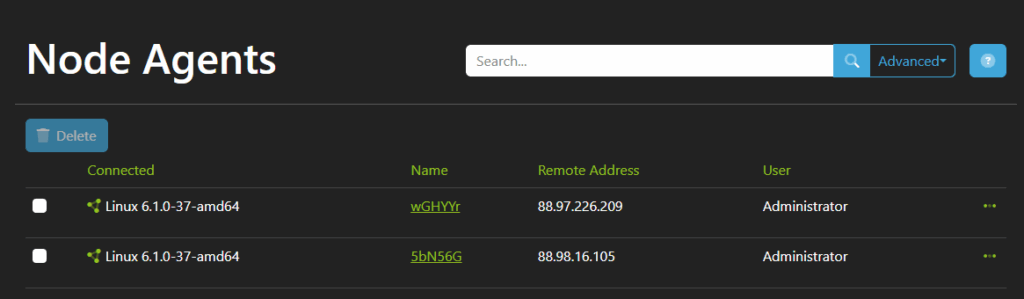
Your agent is now authorized. You can check this status on the agent at any time by typing: nodal-do status
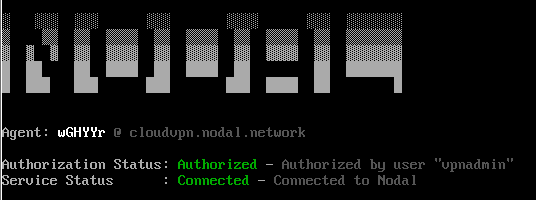
or by logging onto your tenant’s web UI and navigating to Resources->Node Agents.
You can now continue your configuration by creating a network.