Documentation
FileDrop
Installing FileDropNodal VPN
Getting Started with Nodal VPNSigning up for Nodal VPN
Deploying Nodal Agent on Proxmox
Deploying Nodal Agent on VMware ESXi
Deploying Nodal Agent on Hyper-V
Creating a VPN Network
Nodal VPN Client Configuration
Installing the Windows VPN client
Connecting the Nodal VPN Client
Setting a static IP on the Nodal Agent
Password Express
Getting Started with Password ExpressSigning up for Password Express
Installing Windows Connect
Performing a Password Reset
Configuring Authentication Policies for Password Reset
Enrolling a User
Secure File Exchange
Installing on WindowsInstalling on Linux
Installing an SSL Certificate
Uninstalling (All Platforms)
Virtual File System
Browsing Files
Sharing Files
Upload Forms
Incoming Files
Sharing Shortcodes
File Systems
Mounting External FilesLocal Files
Plan Storage
SFTP Folders
Windows Shares
S3 Buckets
Goggle Cloud Storage
Azure Containers
Sharing Files
Introduction
The Secure File Exchange Server enables users to share files with external parties by creating a unique URL that can be shared over email. Anyone in possession of the URL can download the file, however, there are additional options to protect the share with a password, and require terms and conditions to be accepted.
Sharing is enabled on a mount-by-mount basis, providing the administrator with full control over where files can be shared from and who can share them.
Enable Sharing
Before a file can be shared, the administrator must have enabled sharing on a file system mount. This option is available when creating or editing a file mount, select the Add Folder Extension option and select Sharing. The Sharing tab is now added to the page, select this and the Sharing options are available. The administrator can define whether users can share files and/or folders from this resource.
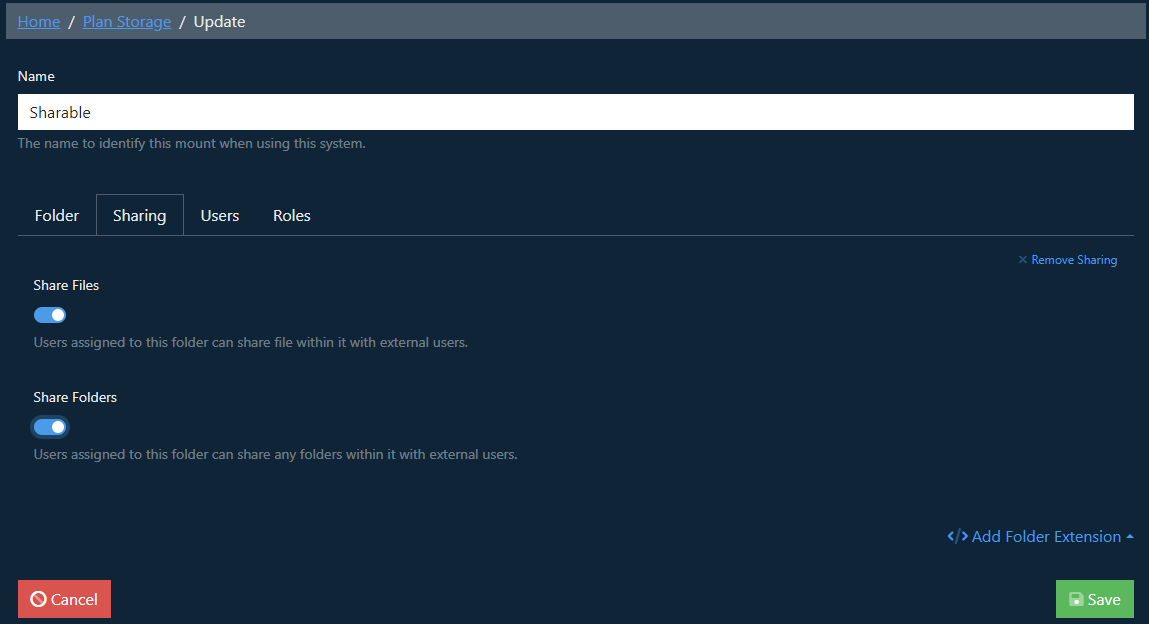
By enabling file sharing the administrator establishes the right to share for users assigned to the file mount. At this stage no files are accessible by third parties, a user must explicitly create a sharing link to the file object they want to share. It is this resource that determines that the file can be accessed through the sharing URLs.
Sharing Files
When the user browses the file system and enters a file mount that has sharing enabled, new actions are available on file objects that can be shared.

The link icon provides a dropdown menu with the sharing options.

Share Link
The quickest way to share is to use the Share Link option. Clicking this option will load a new Download page providing multiple options.
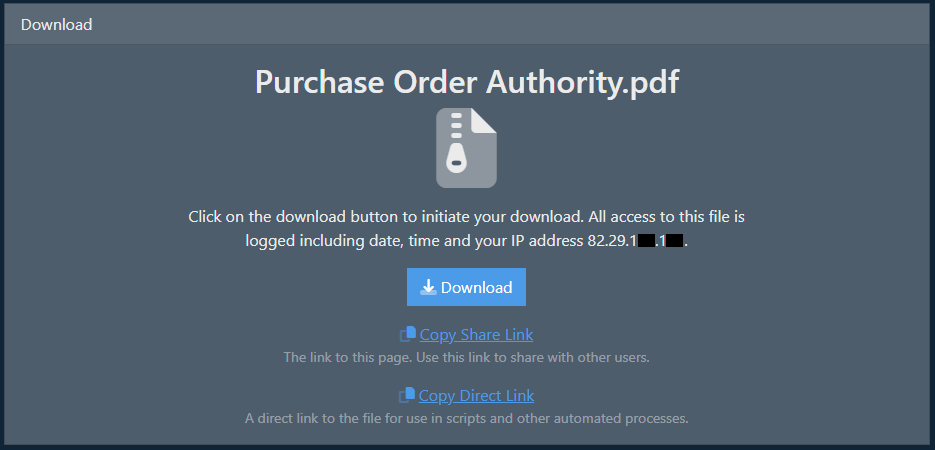
Selecting the Download button will download the file to your local system. Selecting Copy Share Link will automatically set up a share to the file object and copy the URL to the clipboard. Selecting Copy Direct Link provides a direct link that is copied to the clipboard, this link can be used for automated scripts where the URL needs to go directly to the file.

The user can now paste the URL into an email or other media to share the file.
When accessing the URL the third party is presented with a page, stating that the access and their IP address will be logged.
Share with Options
If the user chooses to create a share with options, they will be presented with a preconfigured share resource page with the path set. The user should configure the share as required and save it.
Share Tab
The share tab shows the path to the file within the Virtual File System and a shortcode.
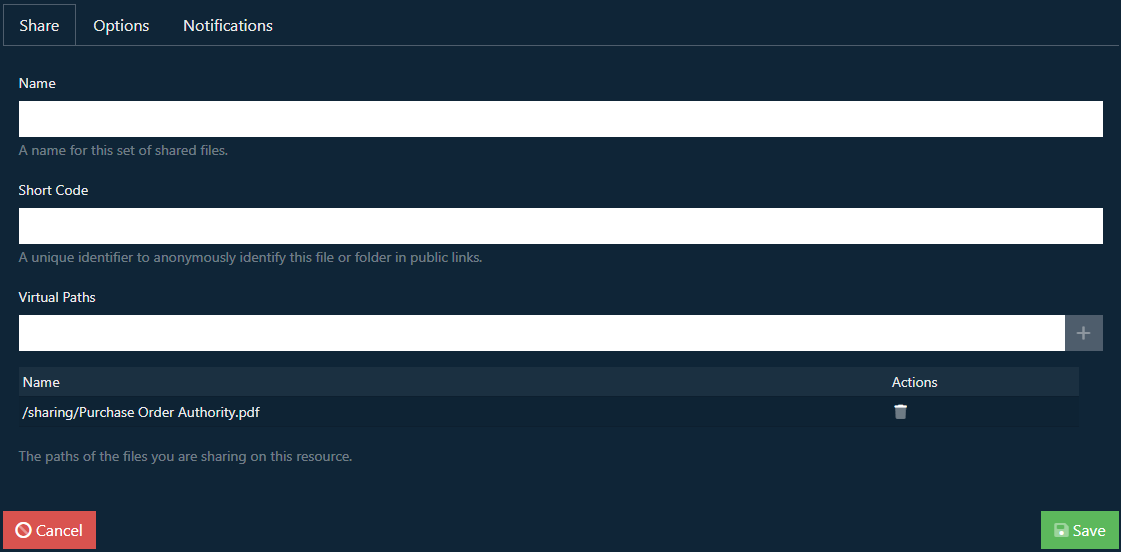
Short Code
If left empty the shortcode will be automatically generated as an eight-character alpha-numeric string. This is used as a system-wide unique value to identify the share. You can provide your own value should you want it to be more user friendly.
Options Tab
The options tab allows you to configure password protection and terms and conditions.
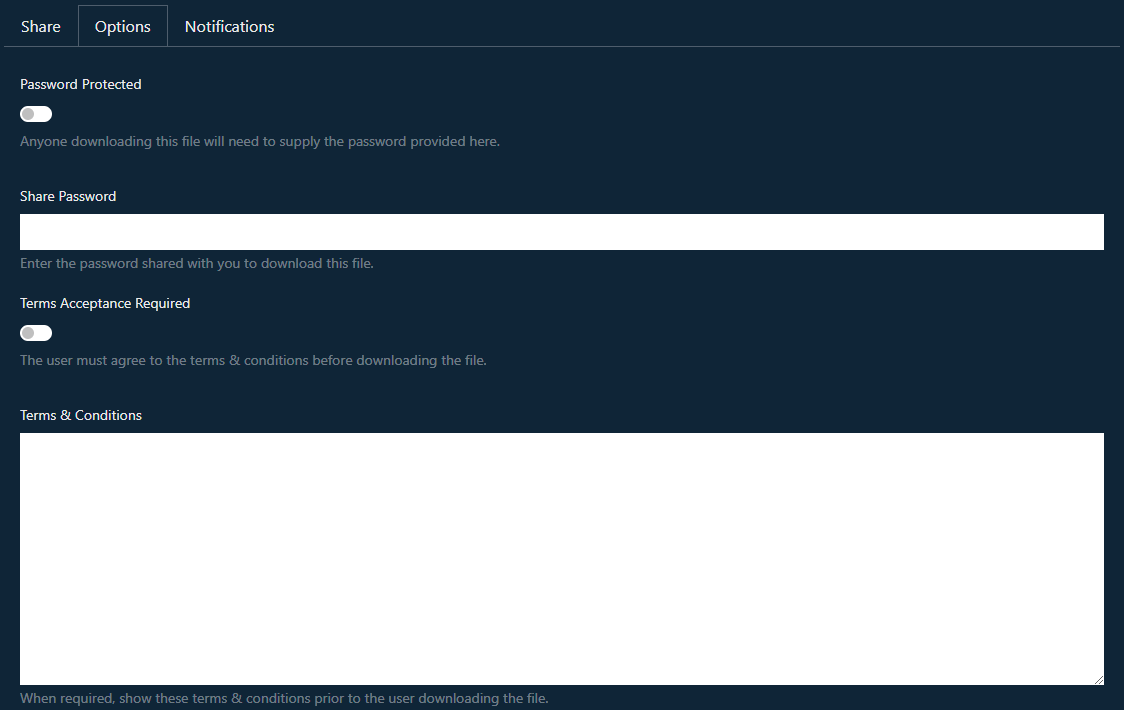
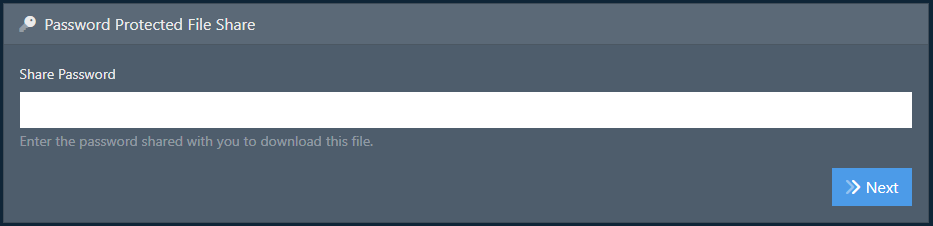
Password Protection
If you enable password protection then the user must enter the configured password before they are able to download the file. There is no change to the URL that is generated, the system will automatically redirect the user to enter the password if they have not already done so.
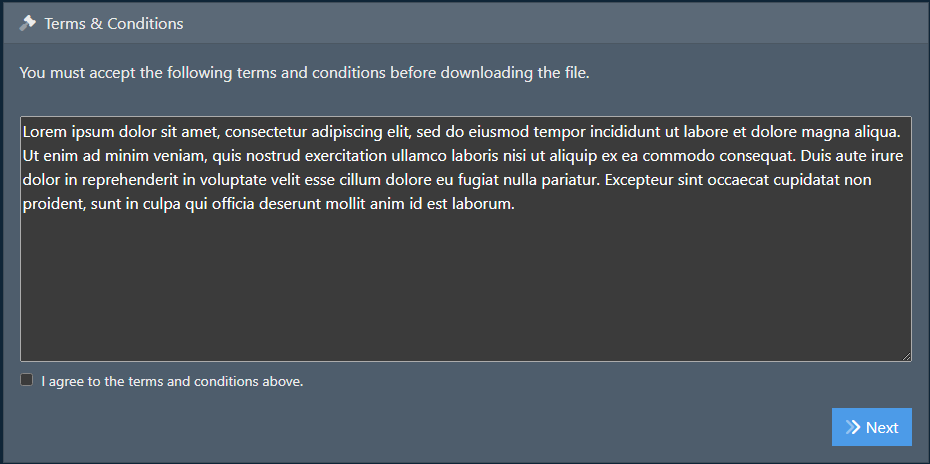
Terms and Conditions
You can require that a user accept terms and conditions before they download the file. Again, this is an automatic action with the user being redirected and presented with the terms and conditions before they can download the file.
In the case where a share is both password-protected and requires terms and conditions, the password will be requested first.
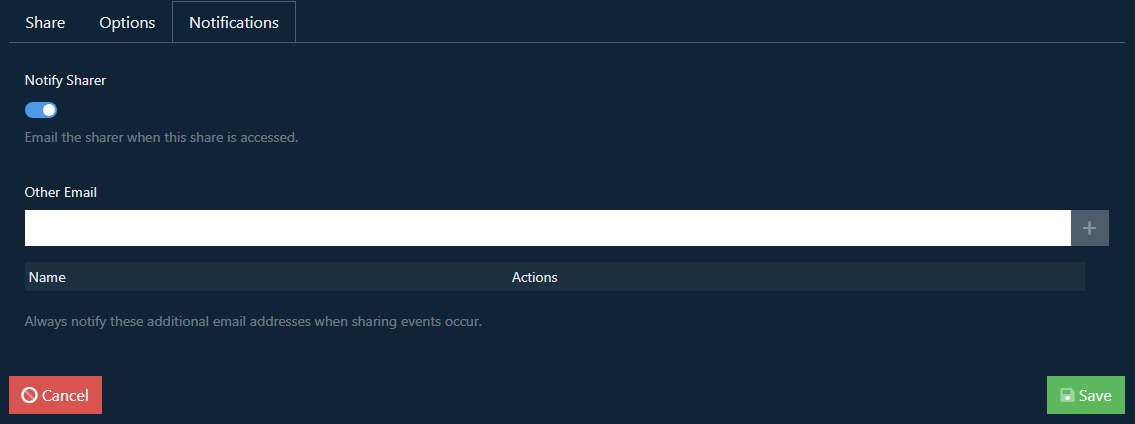
Notifications Tab
You can configure email notifications on the Notifications tab. By default, the sharer of the file will be notified by email each time the share is accessed. You can add other email addresses in the Other Email field.
Viewing Shared Files
Navigate to Resources->Shared Files and you will see a full list of all files that have been configured to be shared.
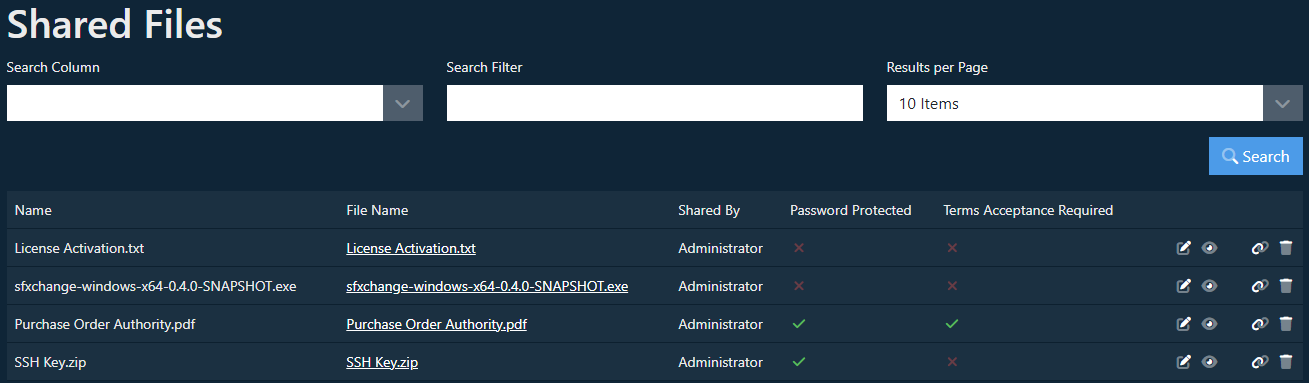
You can see at a glance the name of the file, who shared it and if it has been password protected or has a terms acceptance requirement. Using the Edit option you can change the settings that the file has. The delete option also allows you to remove a file from being shared.
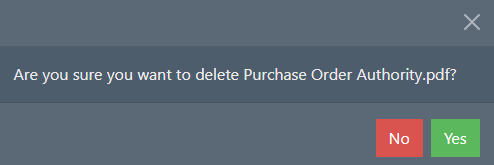
This does not delete the file from the system, just the share, so if this needs resharing later you can do so again.