Documentation
FileDrop
Installing FileDropNodal VPN
Getting Started with Nodal VPNSigning up for Nodal VPN
Deploying Nodal Agent on Proxmox
Deploying Nodal Agent on VMware ESXi
Deploying Nodal Agent on Hyper-V
Creating a VPN Network
Nodal VPN Client Configuration
Installing the Windows VPN client
Connecting the Nodal VPN Client
Setting a static IP on the Nodal Agent
Password Express
Getting Started with Password ExpressSigning up for Password Express
Installing Windows Connect
Performing a Password Reset
Configuring Authentication Policies for Password Reset
Enrolling a User
Secure File Exchange
Installing on WindowsInstalling on Linux
Installing an SSL Certificate
Uninstalling (All Platforms)
Virtual File System
Browsing Files
Sharing Files
Upload Forms
Incoming Files
Sharing Shortcodes
File Systems
Mounting External FilesLocal Files
Plan Storage
SFTP Folders
Windows Shares
S3 Buckets
Goggle Cloud Storage
Azure Containers
Connecting the Nodal VPN Client
Once you have the Nodal VPN client installed, all you need to do is to add a new connection, after which you can connect to your Nodal VPN network.
1. Adding a new connection.
Launch the Nodal VPN client.
Enter the address of your Nodal VPN cloud tenant, this can be either the hostname or the full URL.
You can optionally tick the option to Connect to this network when my computer starts (this requires a client configuration type of WireGuard – or in other words a connection that doesn’t need reauthentication).
You can also optionally choose to untick Stay connected to this network (when this option is on, the client will attempt to autoreconnect if it loses its connection).
Click Connect.
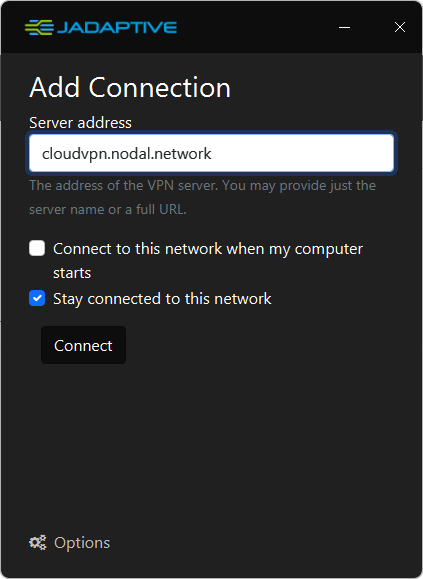
The client will now connect to your Nodal VPN Cloud Tenant for authentication.
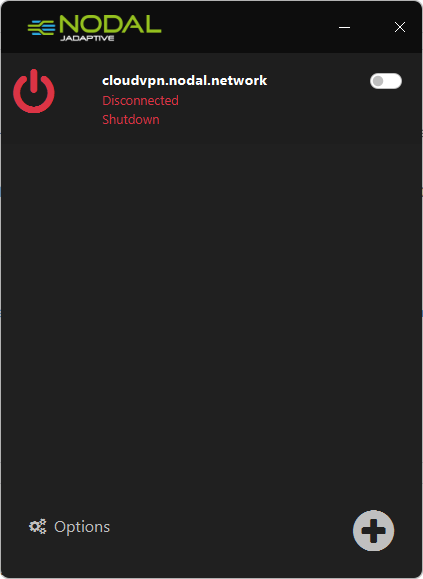
2. Starting a connection
At any point after creating your connection, you can start it simply by clicking the On button next to your connection.
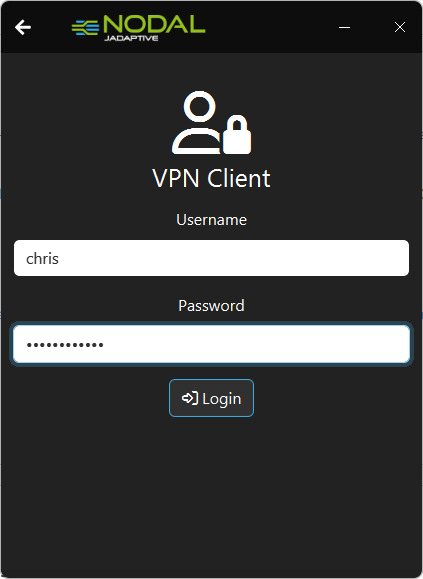
You will then be prompted for authentication. Enter your credentials and press enter or click Login.
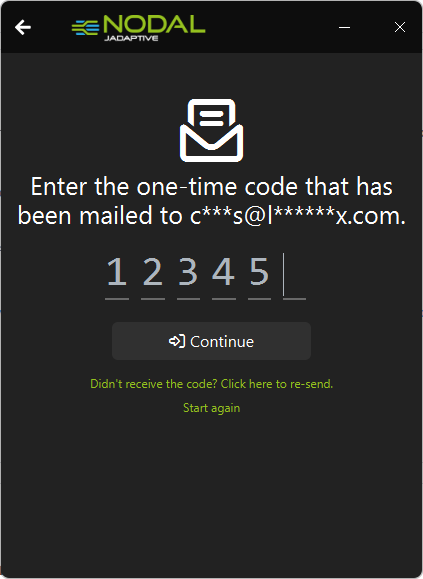
If you have any 2FA enabled, enter your 2FA credentials.
Your client should now be connected and show a green tick icon.
You are now connected to your network.
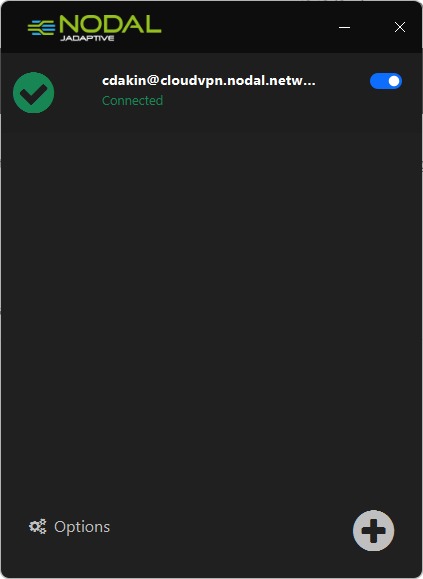
The connection can be stopped at any time by turning the connection slider off again.
If you wish to add further connections, you can click the + at lower right and proceed again as above.