Documentation
FileDrop
Installing FileDropNodal VPN
Getting Started with Nodal VPNSigning up for Nodal VPN
Deploying Nodal Agent on Proxmox
Deploying Nodal Agent on VMware ESXi
Deploying Nodal Agent on Hyper-V
Creating a VPN Network
Nodal VPN Client Configuration
Installing the Windows VPN client
Connecting the Nodal VPN Client
Setting a static IP on the Nodal Agent
Password Express
Getting Started with Password ExpressSigning up for Password Express
Installing Windows Connect
Performing a Password Reset
Configuring Authentication Policies for Password Reset
Enrolling a User
Secure File Exchange
Installing on WindowsInstalling on Linux
Installing an SSL Certificate
Uninstalling (All Platforms)
Virtual File System
Browsing Files
Sharing Files
Upload Forms
Incoming Files
Sharing Shortcodes
File Systems
Mounting External FilesLocal Files
Plan Storage
SFTP Folders
Windows Shares
S3 Buckets
Goggle Cloud Storage
Azure Containers
Mounting S3 Buckets
Introduction
In our Mounting External Files article, we show you how to create a mount and assign it to your users. This is a supplementary article that shows you how to configure the mount to set it up pointing to an AWS S3 Bucket resource.
The Folder Tab
When configuring an AWS S3 Bucket as a mount, the folder tab will contain the Bucket and Path fields.
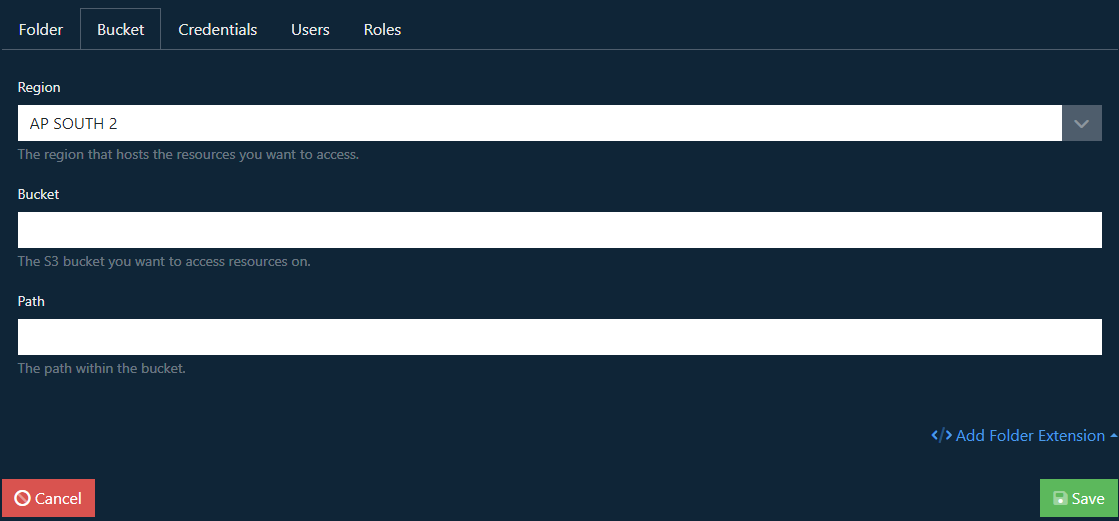
Region
Using the dropdown specify the region that the S3 bucket is hosted.
Bucket
Enter the name of the bucket in your AWS account that you want to access. For example, jadaptive-bucket
Path
If you want to limit browsing of the bucket to a specific path within then add the path here. For example, versions/1.0
See below for help on how to create an S3 bucket.
Credentials
Enter the AWS credentials that will be used to access the bucket. This will require an Access Key and Secret Key with the necessary permissions to access the bucket.
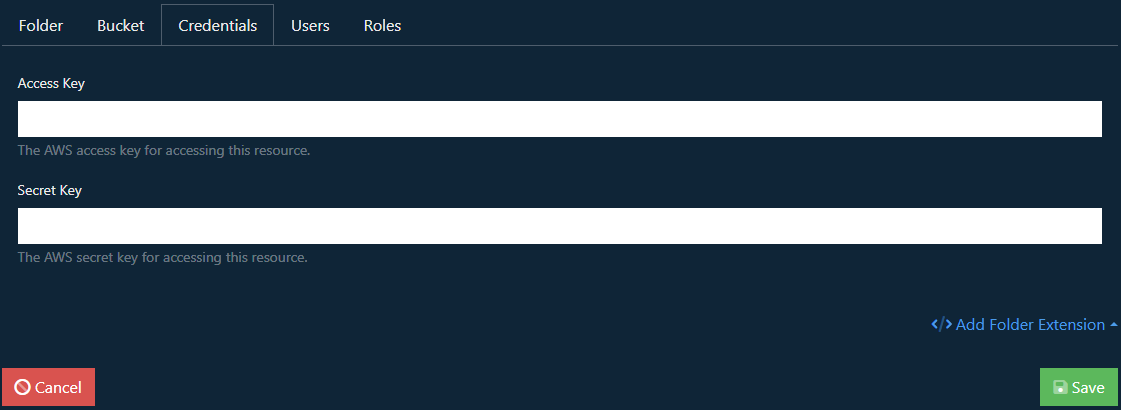
See below for help on how to create a set of credentials for your bucket.
Creating an S3 Bucket
This exercise can be a complex operation because of the many options available in AWS. For the uninitiated with an active AWS account, the minimal step required is to log into AWS, navigate to the S3 sections and use the Create Bucket option.
Provide a bucket name on the Create Bucket page, leaving all the fields as their default values.

Clicking Create Bucket to complete the operation.
This should return you to the bucket listing and at the top of the page, you should see a message similar to the image below.

You should also see the new bucket in your listing

NOTE: We just created a bucket with no public access, however, generally this is preferred so that you can control who has access via the server users and permissions. When we add the credentials, that user will need to have permission to access the bucket.
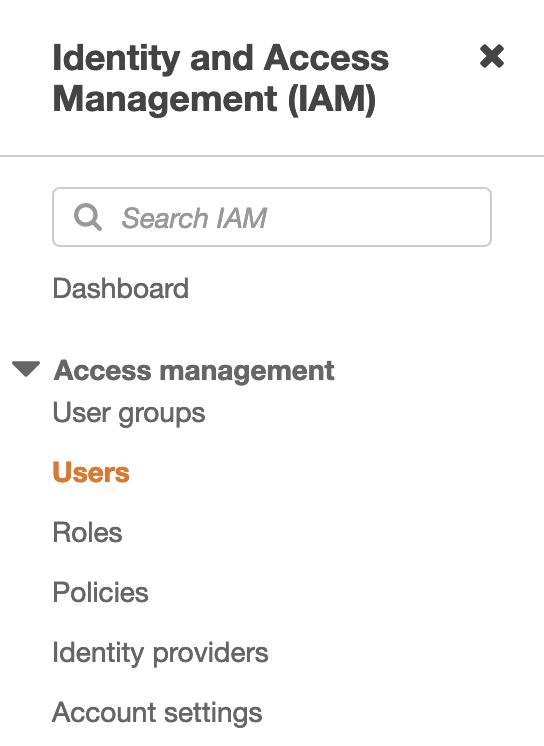
Creating AWS Credentials
To create a new set of credentials navigate to your AWS account and select the IAM service. Select the Users option in the Access management menu.
Click Add Users to create a user. This will display a wizard that will guide you through the creation of the user.
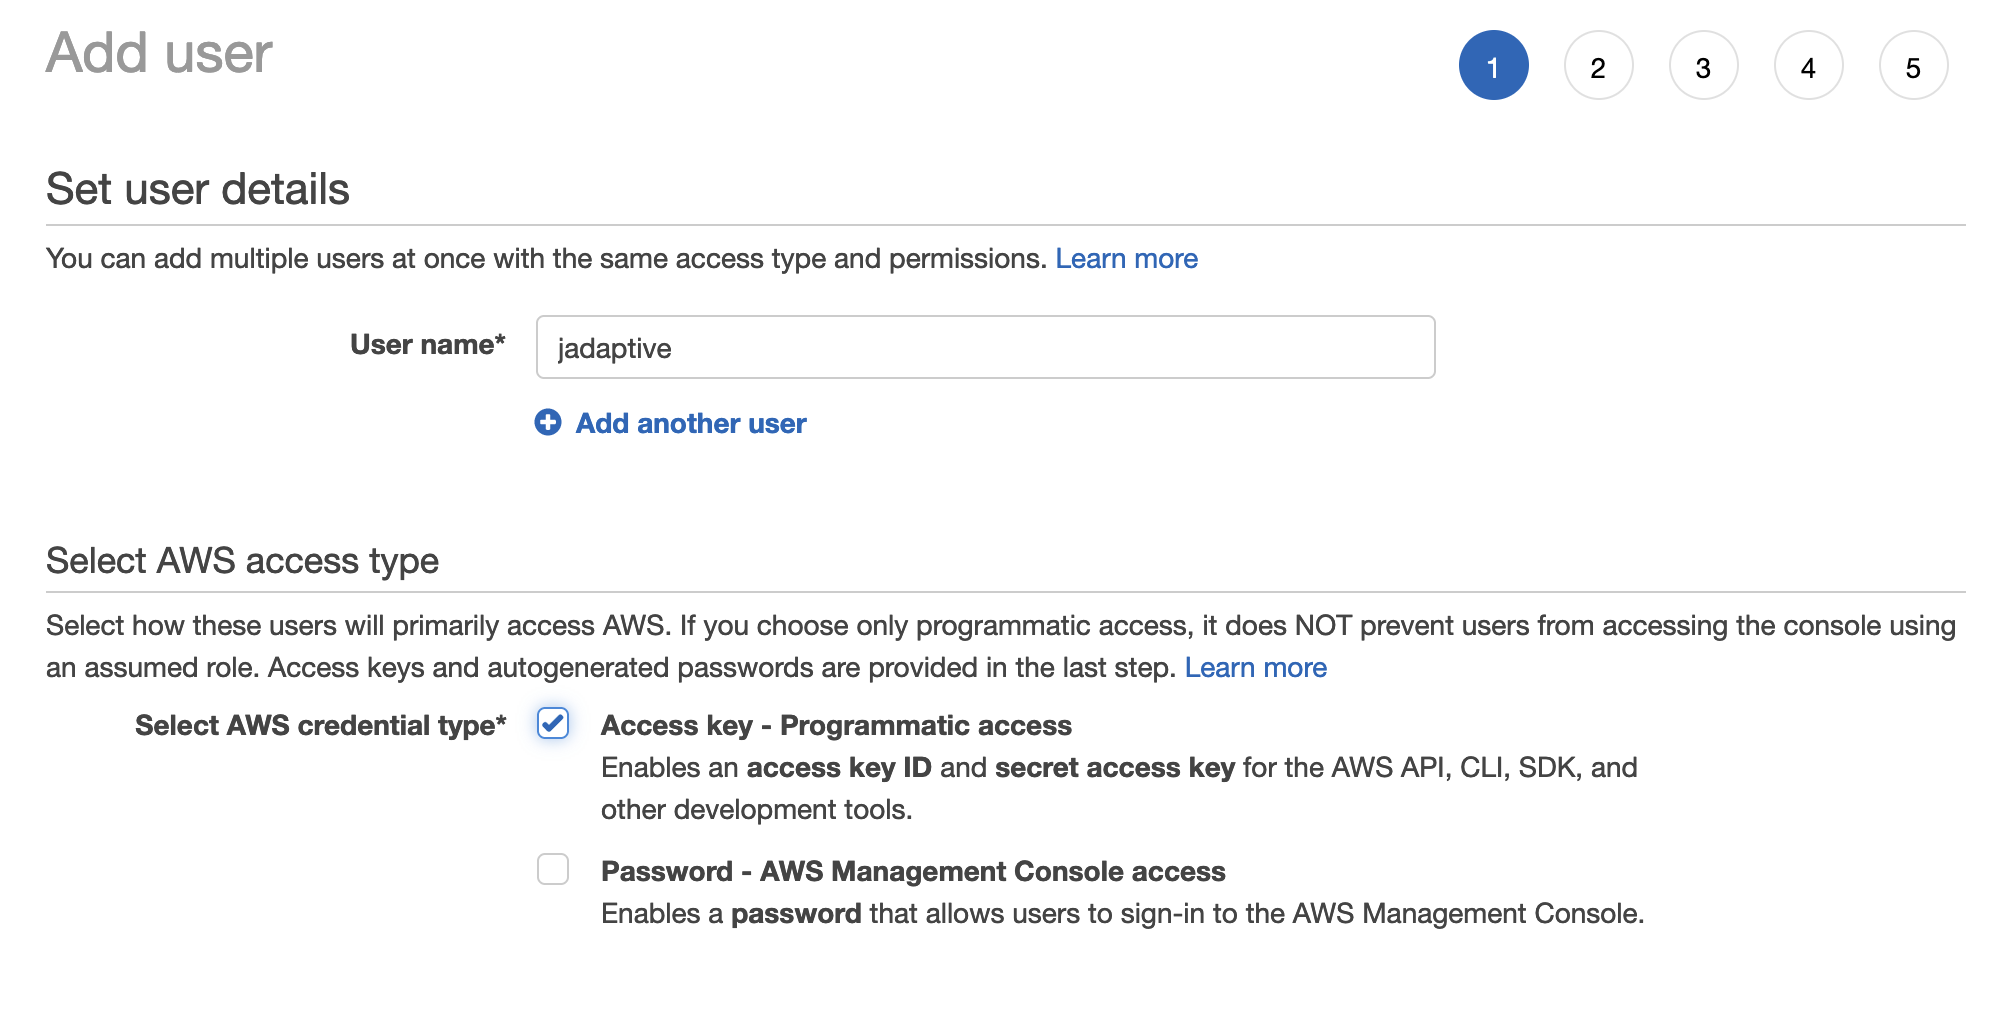
Enter your preferred username, for example jadaptive
In the Select AWS access type field, check the Access key – Programmatic access option.
Click Next: Permissions
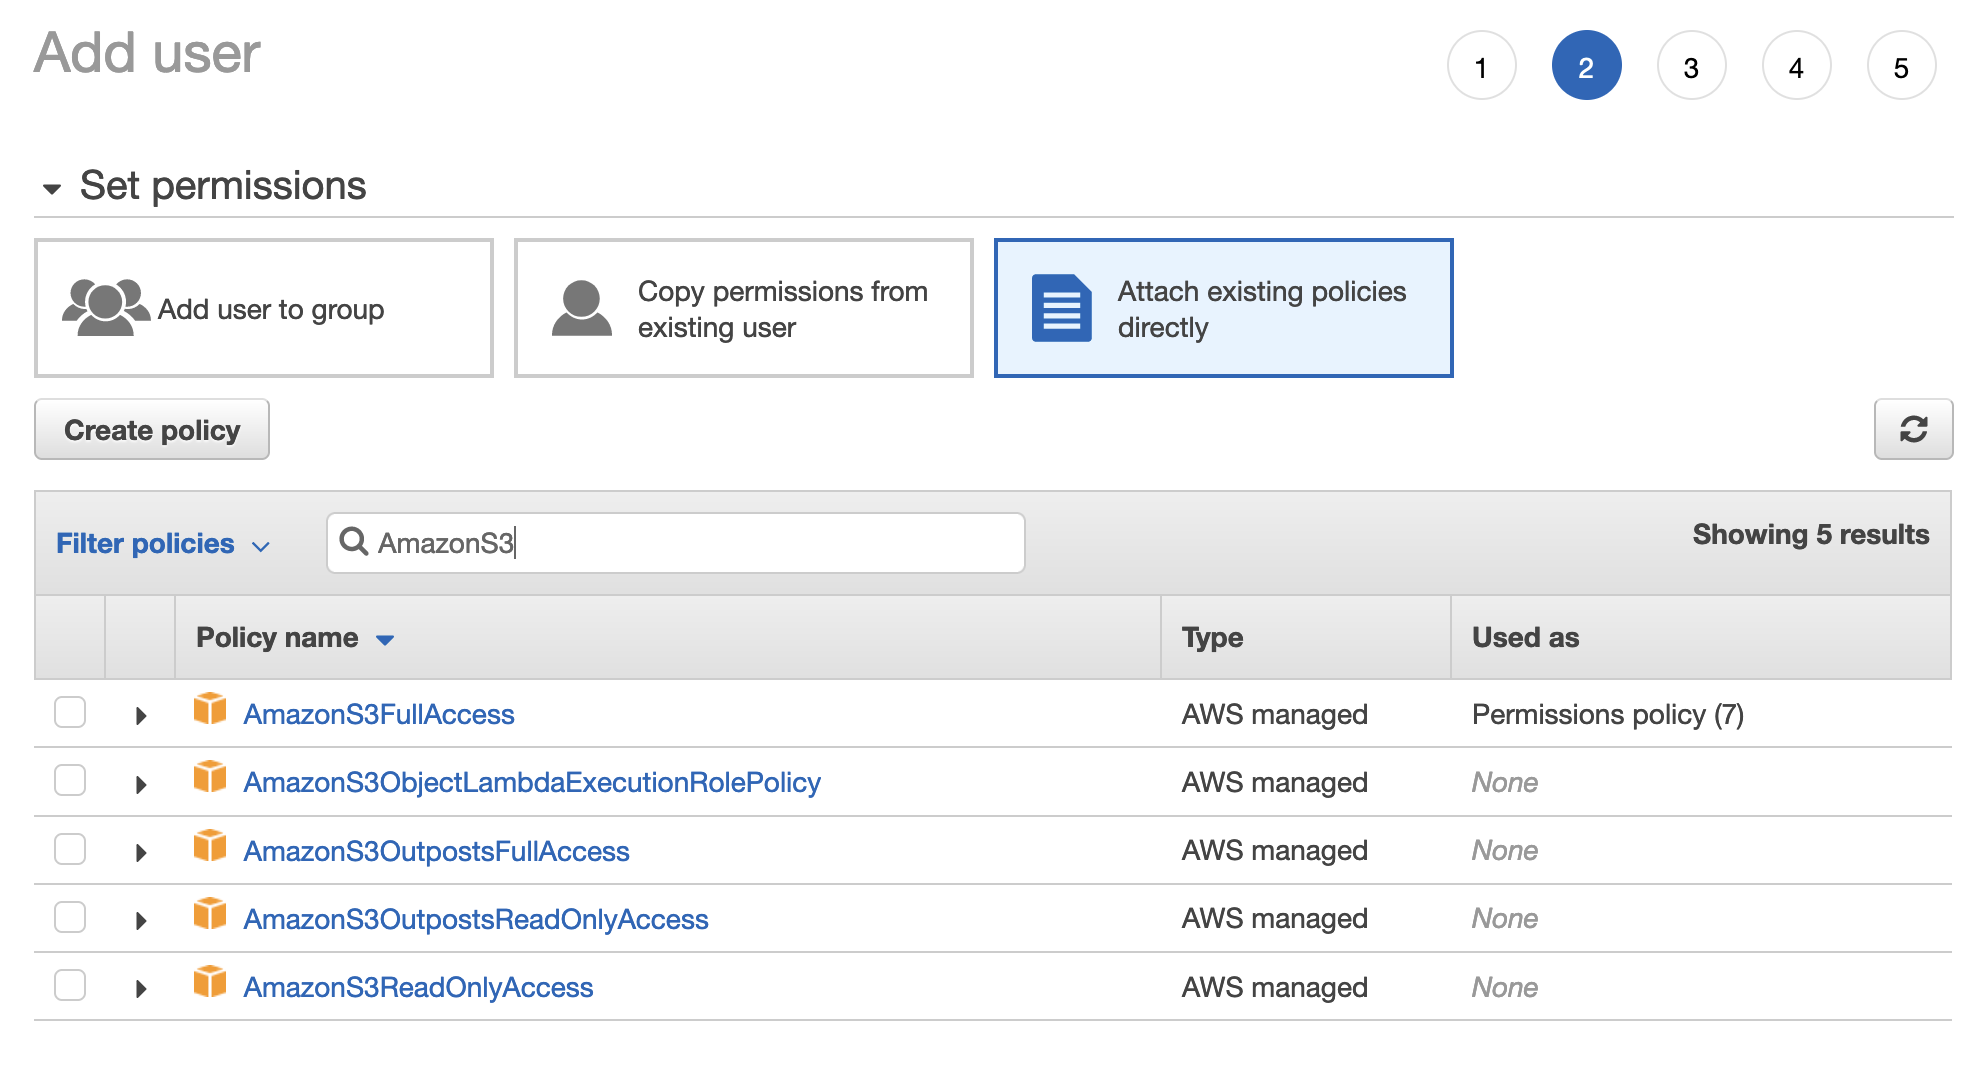
You are now in the Set Permissions section. Click/select the Attach existing policies directly option towards the top of the page.
This will show a list of pre-existing policies you can select. In the filter input field type AmazonS3 to see the list of existing S3 permissions. For full read/write access select the AmazonS3FullAccess policy.
Click Next: Tags
You can ignore this section.
Click Next: Review
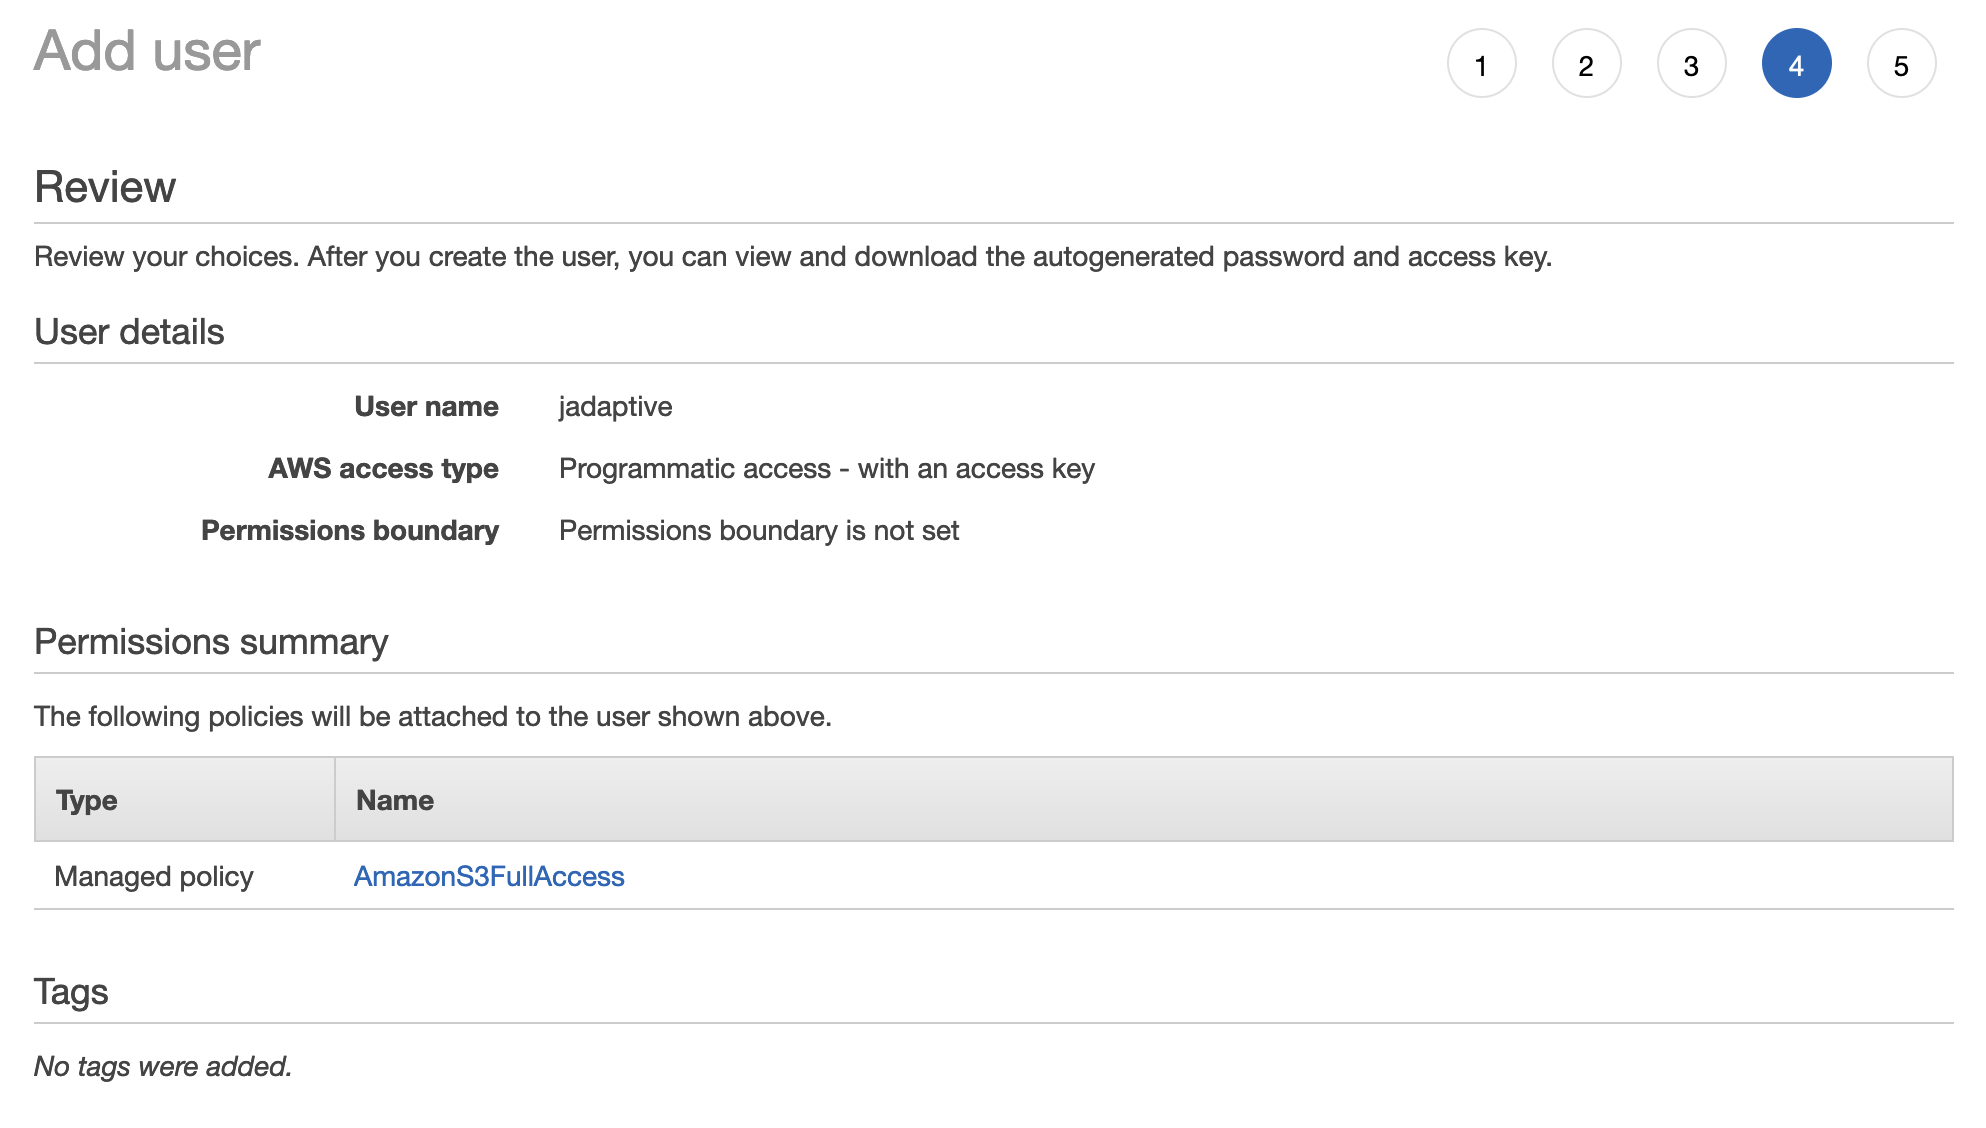
Review the information presented to ensure it aligns with the inputs you have made.
Click Create User to complete the operation
You will now be presented with the credentials for the user. Enter these details into the fields in the Credentials tab when creating your Mount.